

基于 Pi05 VLA 的玩偶分拣实战:从数据采集到实机推理

硅基生命训练师
笔者基于乐聚机器人开源项目 Kuavo Learning Studio 中提供的 Pi 0.5 VLA(Vision-Language-Action)模型,在 Leju Robotics Kuavo 5 五代人形机器人平台上完成了一个玩偶分拣任务场景的搭建与部署。本文将结合实际项目经验,分享从任务设计、数据采集、数据处理、模型训练,到机器人实机推理的完整流程,希望能够为具身智能与 VLA 方向的开发者提供一些参考与帮助。
Pi 简介
Pi(Physical Intelligence)是一种面向通用机器人操作任务的 Vision-Language-Action(VLA)基础模型,通过统一建模视觉感知、语言理解与动作生成,让机器人能够根据自然语言指令理解环境并生成操作动作,实现抓取、分拣、搬运、双臂协同等多种任务。Pi0.5 在 Pi0 基础上进行升级,延续了 PaliGemma 视觉-语言骨干网络与 Action Expert 动作专家模块架构,并引入 Knowledge Insulation 训练策略以提升模型学习效率与泛化能力,同时采用基于 Flow Matching 的动作生成头,实现连续动作预测。

相关链接:
OpenPI GitHub
Physical Intelligence
Pi0.5 论文:π0.5: a Vision-Language-Action Model with Open-World Generalization (arXiv)
场景任务设计
| 物品 | 数量 | 尺寸 | 购买链接(参考) |
|---|---|---|---|
| 升降桌 | 1 | 橡木色+白腿 120*60cm | https://3.cn/-2KI2tow?jkl=@J0SNEDFzBn2@ |
| 桌布 | 1 | 香槟色140*180cm | https://3.cn/2-OwTWjX?jkl=@WDdaqB2sMKh@ |
| 水豚噜噜玩偶 | 4 | 坐姿 * 2 冰淇淋 * 2 | https://3.cn/2OwZc-UD?jkl=@O39Y2CanlEg |
| 马上有钱毛绒小马 | 4 | 红色 | https://e.tb.cn/h.RcpyaLRXvnaSQ14?tk=8rLc5HgGeK8 |
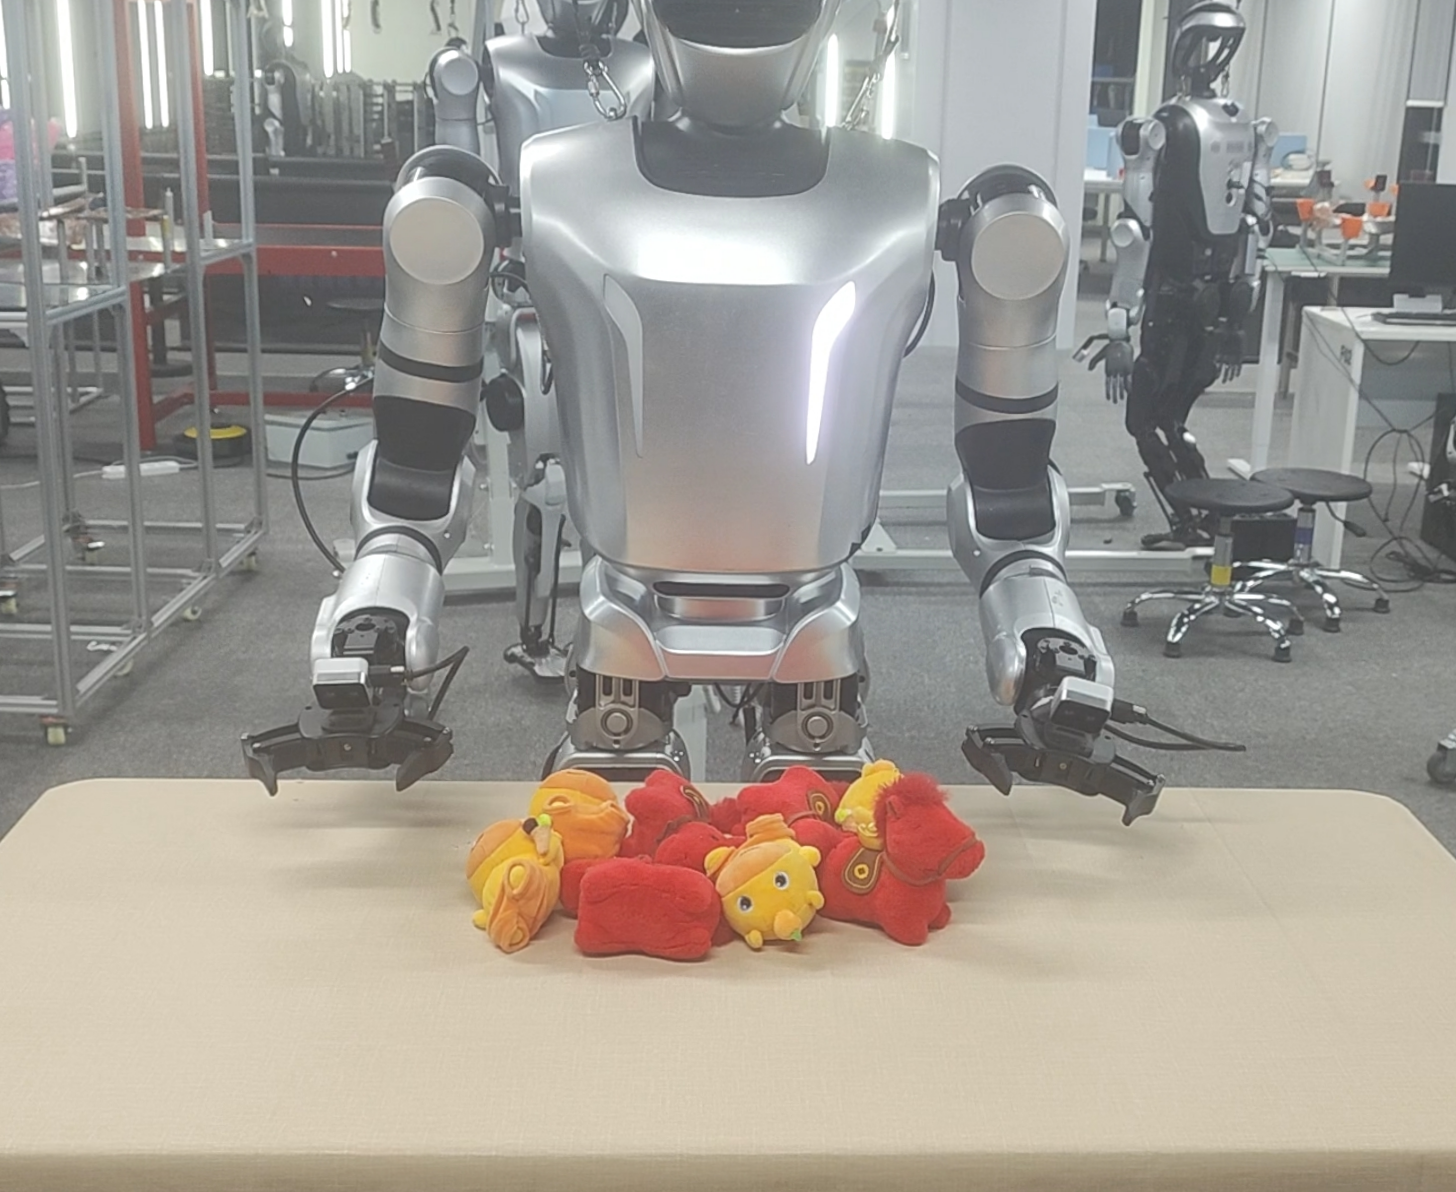
场景布置:桌子高度调整为距离地面81cm(测试适合 Kuavo 5 VR操作),铺上香槟色桌布,将4个黄色水豚玩偶和4个红色小马玩偶随机混乱摆在桌子中间区域。
任务设计:机器人执行分拣玩偶的任务,把黄色水豚玩偶分拣至桌子右端,把红色小马玩偶分拣至桌子左端,单手够不到的玩偶,用对侧手夹取放置到桌面中间,完成8个玩偶的分拣任务。
硬件配置
- 机器人平台 :Kuavo 5(手腕相机+夹爪)
- VR设备 :Quest3
- 路由器 :小米 BE6500 Pro WiFi7 * 1
- USB转网口设备:绿巨能USB3.0千兆有线网卡 * 1
- Type-C转网口设备:绿联Type-C转网口RJ45 * 1
- 网线:2m 千兆网线 * 2
- 训练服务器(阿里云服务器)
- GPU:4*5880 48G
- CPU:AMD EPYC 9T24 96-Core Processor
- 内存:384G
- 存储:2TB
- 推理主机(本地)
- GPU:NVIDIA GeForce RTX 4090 D 24G
- CPU:Intel i9-14900KF
- 内存:64G
- 存储:2TB
数据采集与筛选
1. 数据采集
kuavo-ros-opensource 仓库版本切到 1.4.0 tag,按官方文档 有线VR方案使用指南 | Kuavo Manual 连接机器人与VR设备,用 有线+末端增量式VR摇操 的方式使用 乐聚数采平台 采集真机数据,采集前使用数采平台的端侧控制来控制机器人低头30°,看全整个场景,使用方法可以参考乐聚数采平台 用户手册 | KuavoData Manual。
采集数量:400条
初始状态:桌子高度 81cm,机器人躯干外壳距离桌面边缘约10-15cm;机器人双手置于桌面上方10-15cm。
采集步骤:机器人执行分拣玩偶的任务,把黄色水豚玩偶分拣至桌子右端,把红色小马玩偶分拣至桌子左端,单手够不到的玩偶,用对侧手夹取放置到桌面中间,完成8个玩偶的分拣任务。
采集要求:①左右手随机夹取,不要刻意先夹取单种玩偶或者先分拣完单种玩偶。②每个玩偶要完全夹住身体,不能夹毛发或者边角区域。③玩偶要尽量分拣至桌面两侧,不要掉落。④不能有夹取失败或者犹豫不绝等不良的动作。⑤每条数据的时长不能超过1分20秒
单条采集效果:
⚠️注意事项:
①通过头部控制接口调整机器人低头角度,确保视野能够完整覆盖任务场景即可(笔者在该场景中设置低头 30°)。
②需要确保头部相机与手腕相机的画面方向一致,避免出现左右镜像或方向相反的情况。VLA 模型高度依赖“视觉—动作”对应关系,多相机输入需要共享统一的空间语义;若画面方向不一致,会破坏视觉与动作的映射关系,影响模型训练效果与任务执行稳定性。
③建议每次采集前都进行一次头部和手部的零点自动标定机器人关节标定 | Kuavo Manual
④需要持续监控相机帧率是否稳定,可通过在上位机终端执行
rostopic hz /cam_h/color/image_raw /cam_l/color/image_raw /cam_r/color/image_raw
正常情况下应保持在约 30 FPS,允许存在 1~3 FPS 的小范围波动;若出现明显掉帧或大幅波动情况,请及时联系乐聚技术人员进行排查。
2. 数据审核与筛选
数据采集完成后,还需对数据进行审核与筛选,目的是剔除低质量数据,例如掉帧、动作迟疑、操作失误、轨迹异常等情况,以保证训练数据的一致性与有效性,提升模型训练效果。
例如:
| 奇怪摆动 | 卡帧、掉帧 | 犹豫、动作迟疑 |
|---|---|---|
 |
 |
 |
| 夹取失败、二次夹取 | 意外钩住夹爪 | 放置位置错误 |
 |
 |
 |
可以在数采平台进行数据审核,给数据打上 审核成功/审核失败 的状态,再通过gym工具数据查询与下载 | KuavoData Manual下载审核成功的数据。笔者在此是直接下载了所有数据,然后在本地主机上审核数据,删除掉了60条不良数据,留下340条有效数据。
3. 数据补充
筛选数据后,笔者又补充了80条分拣单个玩偶的数据(黄色、红色玩偶各40条),希望可以增加数据多样性,降低场景复杂度,强化基础抓取能力,增强模型对基础动作与目标特征的学习能力,加上前面的一共420条数据。
例如:
| 黄色玩偶 | 红色玩偶 |
|---|---|
 |
 |
 |
 |
此场景的rosbag数据集已上传至 LET全尺寸人形机器人真机科研场景数据集 ,其中 Sorting_Dolls-P5-Claw 为Kuavo 5 人形机器人平台,Sorting_Dolls-P4-Claw 为Kuavo 4 pro 人形机器人平台。
Kuavo Learning Studio使用
- Kuavo Learning Studio仓库:LejuRobotics/kuavo_learning_studio: kuavo_learning_studio
- 仓库文档网站:Docs | KUAVO STUDIO
1. 环境部署
参照仓库文档网站Installation说明,笔者在本地4090主机(ubuntu 20.04+ros noetic)上创建 kls_dev环境,并通过 setup_env.sh 脚本一键部署环境,其中flash_attn源码编译需要的时间要长一点。
笔者此次使用的是外挂(非lerobot版)openpi原生pi05,所以需要按照仓库文档网站Installation说明配置一下pi05需要的uv环境:
cd kuavo_model/external_models/openpi/
rm -r .venv
rm uv.lock
# 如果uv需要配置清华源阿里源,在这里配置
# vim ~/.config/uv/uv.toml
# 但是下面有里面又有GitHub拉lerobot仓库的环节,需要代理
# 或者如下用gh-proxy加速
git config --global url."https://gh-proxy.org/https://github.com/".insteadOf "https://github.com/"
uv sync --python 3.11
git config --global --unset url."https://gh-proxy.org/https://github.com/".insteadOf
笔者用的训练服务器是阿里云的4*5880(48G)云服务器(ubuntu20.04)无影云电脑 - 阿里云,不过模型训练不需要ROS环境,所以执行 setup_env.sh 脚本一键部署环境时,脚本第一步会询问"是否需要检查 ROS 环境依赖?[Y/n] (默认: Y): ",这里笔者输入了 N ,数据转换和模型推理会需要ROS环境,笔者打算这两步都在4090主机上进行,云服务器用来微调训练。云服务器也需要配置上面的uv环境。
2. 数据转换
参照仓库文档网站Data Preparation说明,对KuavoRosbag2Lerobot.yaml进行修改,可以参考笔者的配置文件,笔者使用的是Fine-Tuning (LoRA):
`KuavoRosbag2Lerobot.yaml`
hydra:  # Hydra 配置文件保存目录,仅供参数检查使用
  run:
    dir: ./outputs/data_cvt_hydra_save/singlerun/${now:%Y%m%d_%H%M%S}  # 单次运行目录
  sweep:
    dir: ./outputs/data_cvt_hydra_save/multirun/${now:%Y%m%d_%H%M%S}  # sweep 时的根目录
    subdir: ${hydra:job.override_dirname}


# kuavo rosbag数据转换成lerobot-parquet格式的配置文件
# 请注意!!!
# 本分支的数转代码与 lerobot 0.5.2 同步
# 数据集格式使用的是 lerobot dataset v3.0
# lerobot地址:https://github.com/huggingface/lerobot

rosbag:
  mode: normal  # 可选: normal, resume, merge
  rosbag_dir: /home/lab/Desktop/lgn/data/rosbag/Sorting_dolls # rosbag文件存放的目录。normal / resume 模式需要
  target_dir: /home/lab/Desktop/lgn/data/lerobot_datasets/Sorting_dolls  # 输出父目录;最终数据集会生成在 target_dir/lerobot
  lerobot_dir_resume: /path/to/lerobot_resume  # resume 模式下,已有 lerobot 数据集的目录
  lerobot_dir_merge:
    ["/path/to/lerobot1",
    "/path/to/lerobot2"]  # merge 模式下,要合并的多个 lerobot 数据集目录列表

dataset:
  platform_type: "5"  # 硬件平台类型,可选: "4pro", "5w" 或 "5",默认使用 configs/platform/platform_config.yaml 中的 default 值,比赛默认4pro
  eef_type: leju_claw # 末端执行器类型,仿真选择:rq2f85, 真机可选:leju_claw,(夹爪) qiangnao,(灵巧手)
  which_arm: both  # 需要哪一只手臂的关节 + 图像数据,可选: left, right, both,注意图像数据会同时包含头部相机图像

  task_description: "Several red pony plush toys and yellow capybara plush toys are randomly placed in the center of the table. Sorting the toys, move the red pony plush toys to the left side of the table and the yellow capybara plush toys to the right side." # 任务描述,自定义

  train_hz: 10  # 训练数据的采样频率
  main_timeline: head_cam_h # 将哪个相机设为主相机,默认主相机来自:head_cam_h, 可选:wrist_cam_l, wrist_cam_r
  main_timeline_fps: 30 # 主相机的帧率,必须稳定,默认30帧
  sample_drop: 10 # 丢弃episode前后的10帧

  resize:
    width: 848  # 图像缩放宽度,注意请先查看(推荐浏览器foxglove工具)rosbag中图像的原始尺寸,避免放大或缩小带来模糊或拉伸形变等问题
    height: 480  # 图像缩放高度,注意请先查看(推荐浏览器foxglove工具)rosbag中图像的原始尺寸,避免放大或缩小带来模糊或拉伸形变等问题
| 参数 | 描述 | 值 |
|---|---|---|
platform_type |
选择Kuavo 5 人形机器人平台 | "5" |
rosbag_dir |
输入rosbag路径 | /home/lab/Desktop/lgn/data/rosbag/Sorting_dolls |
target_dir |
输出lerobot路径 | /home/lab/Desktop/lgn/data/lerobot_datasets/Sorting_dolls |
task_description |
任务描述(prompt) | "Several red pony plush toys and yellow capybara plush toys are randomly placed in the center of the table. Sorting the toys, move the red pony plush toys to the left side of the table and the yellow capybara plush toys to the right side." |
执行数据转换:
python kuavo_data/CvtRosbag2Lerobot.py
执行完数据转换后,通过scp命令把lerobot数据集传输到云服务器上,进行下一步微调训练。
3. 微调训练
在云服务器上直接使用数据转换脚本输出的数据即可
参照仓库文档网站Model Training说明,对kuavo_model/external_models/openpi/src/openpi/training/config.py中kuavo的config示例进行修改
`TrainConfig`
    TrainConfig(
        # Change the name to reflect your model and dataset.
        name="pi05_sorting_dolls",
        # Here you define the model config -- In this example we use pi0 as the model
        # architecture and perform *full* finetuning. in the examples below we show how to modify
        # this to perform *low-memory* (LORA) finetuning and use pi0-FAST as an alternative architecture.
        model=pi0_config.Pi0Config(
            paligemma_variant="gemma_2b_lora",
            action_expert_variant="gemma_300m_lora",
            pi05=True,
        ),
        # Here you define the dataset you are training on. In this example we use the Libero
        # dataset. For your own dataset, you can change the repo_id to point to your dataset.
        # Also modify the DataConfig to use the new config you made for your dataset above.
        data=LeRobotKuavoDataConfig(
            repo_id="pi05_sorting_dolls",
            root="/home/kangkk/lgn/data/lerobot_data/Sorting_dolls/lerobot",
            base_config=DataConfig(
                # This flag determines whether we load the prompt (i.e. the task instruction) from the
                # ``task`` field in the LeRobot dataset. If set to True, the prompt will show up in
                # a field called ``prompt`` in the input dict. The recommended setting is True.
                prompt_from_task=True,
            ),
            extra_delta_transform=True,
        ),
        # Here you define which pre-trained checkpoint you want to load to initialize the model.
        # This should match the model config you chose above -- i.e. in this case we use the pi0 base model.
        weight_loader=weight_loaders.CheckpointWeightLoader("gs://openpi-assets/checkpoints/pi05_base/params"),
        # Below you can define other hyperparameters like the learning rate, number of training steps, etc.
        # Check the base TrainConfig class for a full list of available hyperparameters.
        num_train_steps=60_000,
        num_workers=8,
        wandb_enabled=True,
        batch_size=256,
        freeze_filter=pi0_config.Pi0Config(
            paligemma_variant="gemma_2b_lora", action_expert_variant="gemma_300m_lora"
        ).get_freeze_filter(),
    ),
| 参数 | 描述 | 值 |
|---|---|---|
name |
config名称,必须唯一 | "pi05_sorting_dolls" |
pi05 |
使用pi05,默认为pi0 | True |
repo_id |
数据集名称 | "pi05_sorting_dolls" |
root |
数据集路径 | /home/kangkk/lgn/data/lerobot_data/Sorting_dolls/lerobot |
weight_loader |
加载预训练权重,改为pi05 | "gs://openpi-assets/checkpoints/pi05_base/params" |
num_workers |
加载数据使用的工作进程数量,增加这个值通常会加快数据加载速度,但会增加CPU和内存占用 | 8 |
wandb_enabled |
启用wandb日志记录 | True |
batch_size |
全局批大小 | 256 |
重要参数:
| 参数 | 描述 | 默认值 |
|---|---|---|
log_interval |
打印训练日志的周期 | 100 |
save_interval |
临时保存权重的周期 | 1000 |
keep_period |
永久保存权重的周期 | 5000 |
在开始训练之前,需要先为训练数据计算归一化统计信息(normalization statistics)。
使用你的训练配置名称运行下面的脚本:
uv run scripts/compute_norm_stats.py --config-name pi05_sorting_dolls # name对应config里的name
微调训练前笔者先登录了wandb账号 https://wandb.ai/
API Key获取:https://wandb.ai/authorize
wandb login #终端执行
然后在终端输入你的 API Key进行登录。
现在可以使用下面的命令开始训练(如果你使用相同配置重新进行微调,--overwrite 参数会覆盖已有 checkpoint)
export CUDA_VISIBLE_DEVICES=0,1,2,3 # 根据实际情况修改使用的GPU,笔者这里用的4*5880,所以设置0,1,2,3
XLA_PYTHON_CLIENT_MEM_FRACTION=0.9 uv run scripts/train.py pi05_sorting_dolls --exp-name=pi05_sorting_dolls --overwrite
该命令会将训练进度输出到终端,并将 checkpoint 保存到 checkpoints 目录。同时,训练日志会保存在wandb/latest-timestamp/files/output.log,你也可以通过 Weights & Biases(wandb)仪表盘监控训练过程。
为了尽可能充分利用 GPU 显存,建议在训练前设置 XLA_PYTHON_CLIENT_MEM_FRACTION=0.9。这会让 JAX 最多使用 90% 的 GPU 显存(默认值约为 75%)。
笔者训练的wandb截图
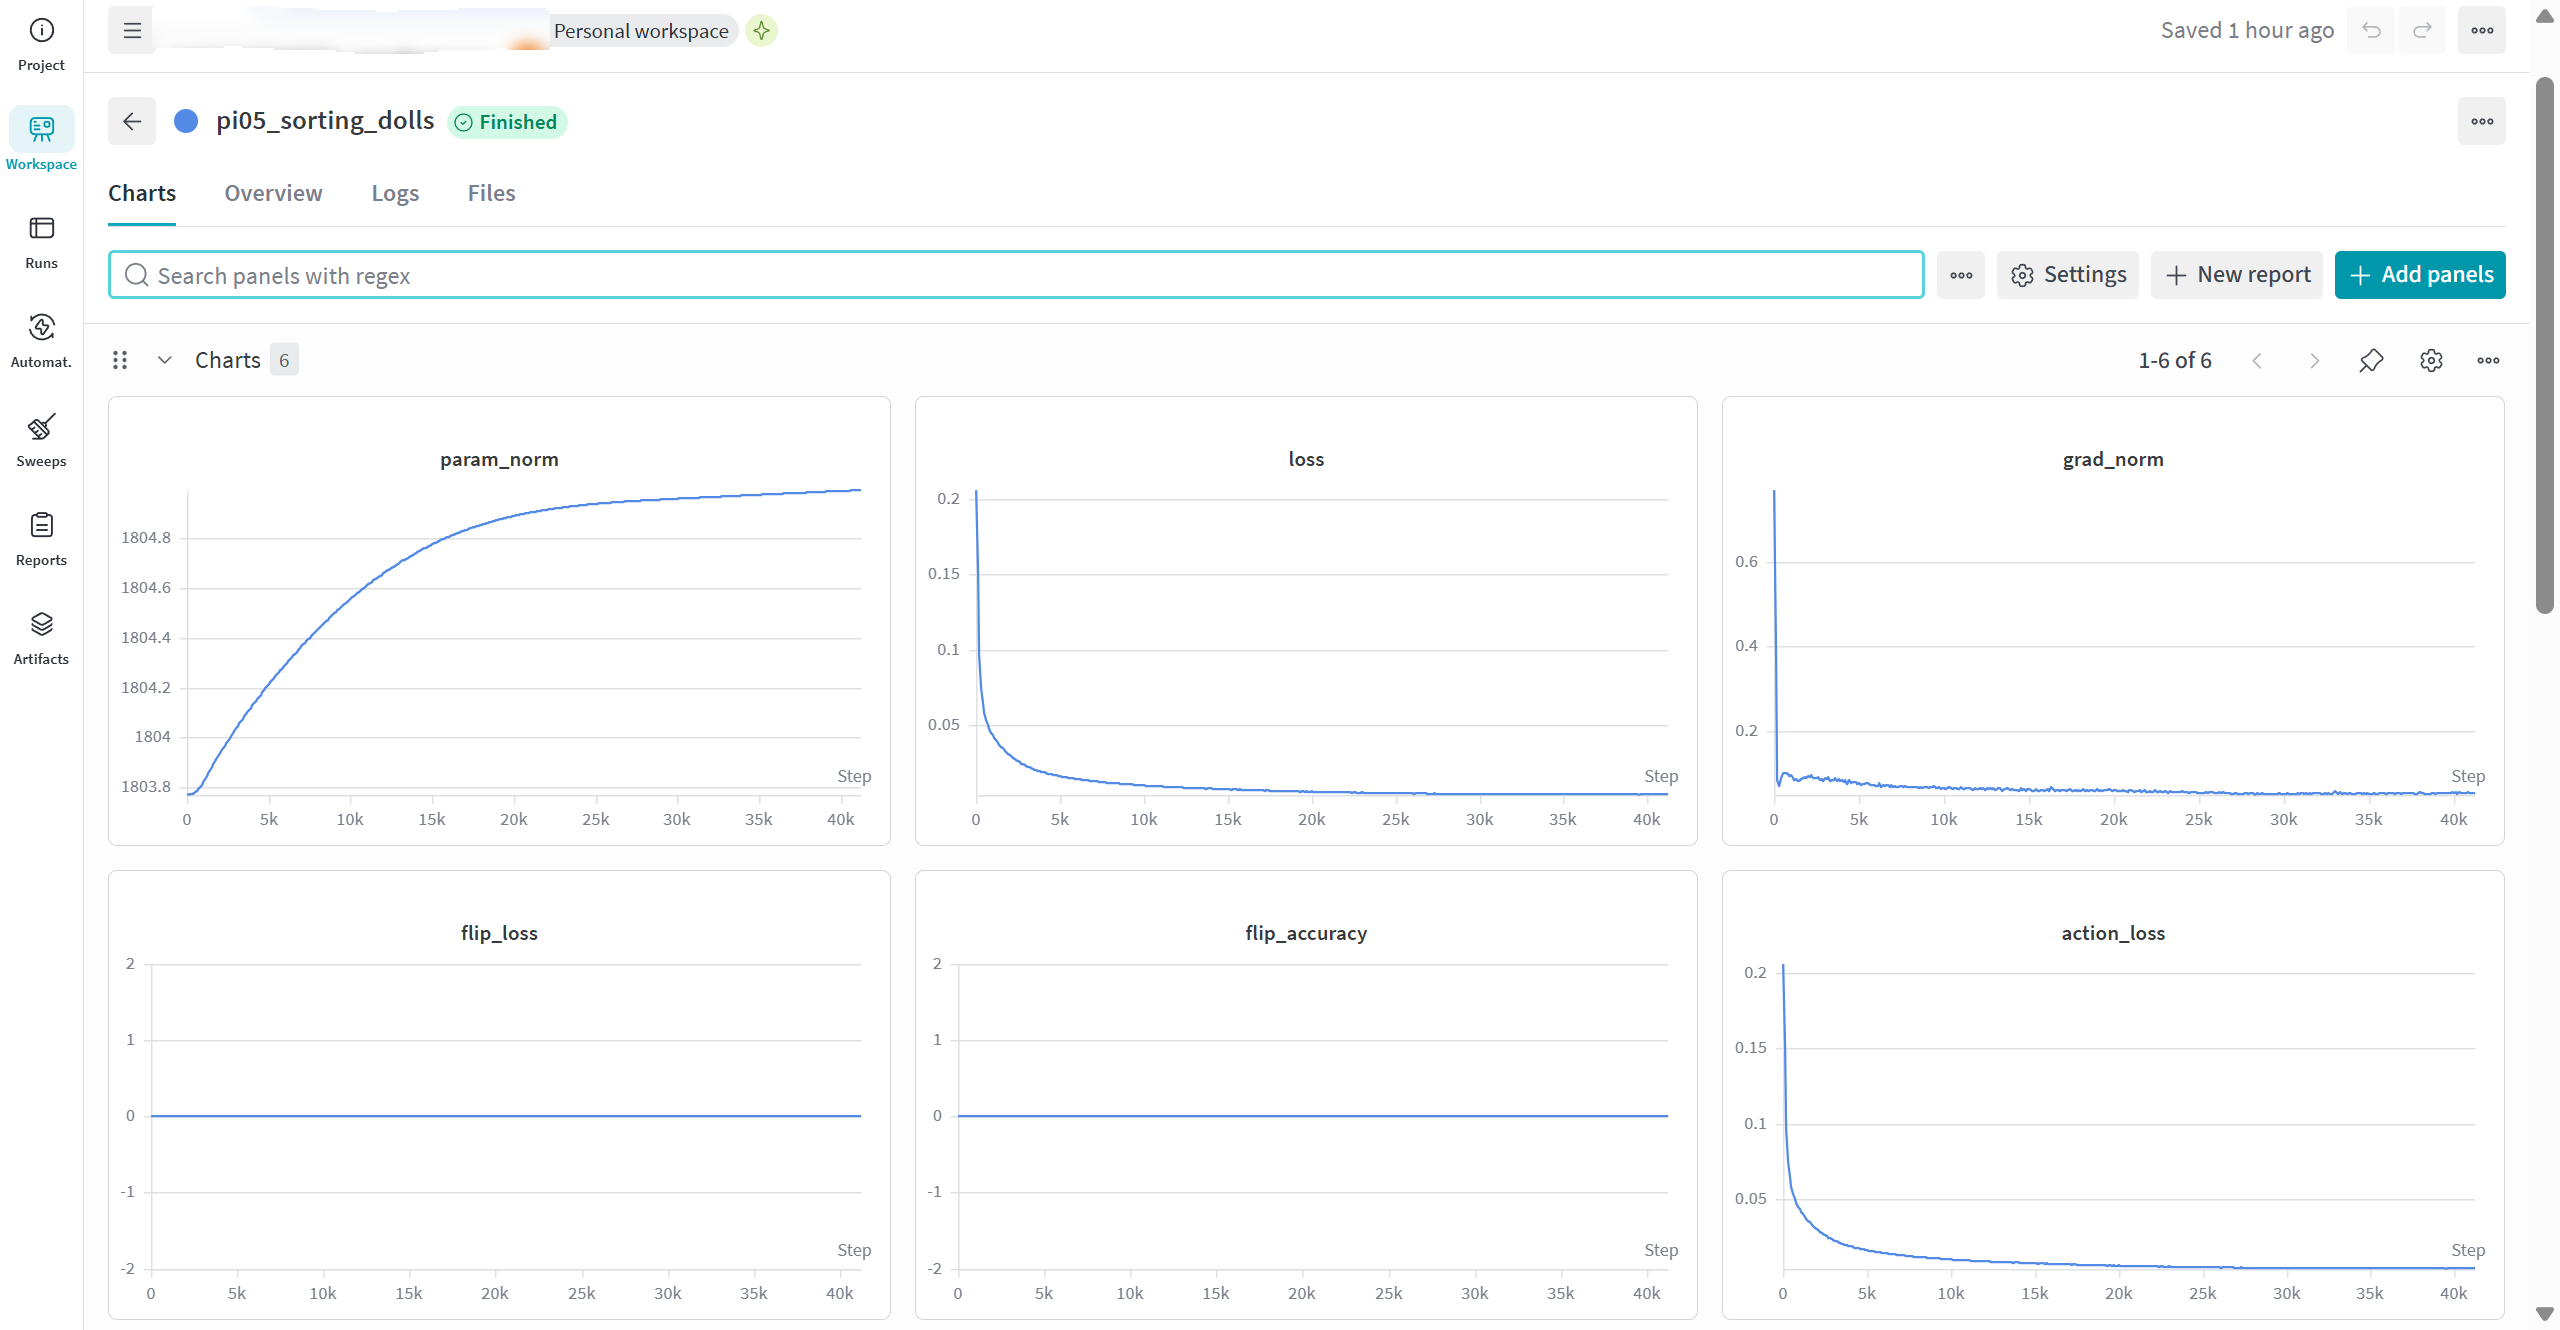
笔者在40k steps左右停止了训练,观察loss已经收敛,取20k steps的checkpoint模型权重通过scp传输到4090主机kuavo_learning_studio仓库相同路径下,更改的kuavo_model/external_models/openpi/src/openpi/training/config.py也同步覆盖4090主机kuavo_learning_studio仓库内的相同文件,进行下一步真机推理会用上。
4. 通过有线网络连接机器人与 4090 训练主机
将USB 3.0 转网口设备的USB端接到机器人后壳下位机USB口处,网口端接网线,连接4090边侧机。
按照仓库文档网站 Inference 中的边侧机桥接通信配置方案教程(基于下位机桥接边侧机和上位机两台机器),执行脚本、设置好ROS配置后,通过rostopic list或其他方式确定边侧机接入Kuavo机器人ROS通讯即可。
Kuavo 5 代机器人也可以按照说明尝试以太网线直接连接机器人后部IO面板以太网口的方案。
5. 实机推理
笔者在此使用的是kuavo_model中的外置模型进行推理,参照仓库文档网站Inference 说明,修改configs/server/launcher.yaml中的配置
`launcher.yaml`
# kuavo_server 统一启动配置 (configs/server/launcher.yaml)
#
# 用法(任选其一):
#   python kuavo_server/launch.py openpi
#   python kuavo_server/launch.py groot
#   python kuavo_server/launch.py lingbotvla
#
# 启动器会读取下面对应 adapter 的 env 段(决定怎么进入环境:uv / conda / 当前 shell)
# 与 args 段(serve.py 的命令行参数),自动拼出原命令并 exec 运行。
#
# 规则:
#   - args 下的 key 直接对应 serve.py 的 --xxx 参数。
#   - 值为 true 的布尔会变成 --flag;值为 false / null / "" 的会被忽略,使用 adapter 内置默认。
#   - 路径可写绝对路径或 ${REPO_ROOT}/... 占位符(REPO_ROOT 自动指向本仓库根)。
#   - 每个 adapter 下方列出了**全部**可用参数;不想覆盖默认值的留空字符串 "" 即可。
#   - YAML 里的 key 是用户在命令行写的"短名";若该短名 != 真实 adapter 名(如 groot != isaac_gr00t_n17),
#     用块内的 `adapter: <真实名>` 显式声明真实 adapter;不写时默认短名就是真实名(如 openpi)。

# 全局服务端参数(所有 adapter 共用,可被各 adapter 内的 args 覆盖)
common:
  host: "*"
  port: 5555
  api_token: ""

adapters:

  # ============================================================
  # OpenPI
  # ============================================================
  openpi:
    env:
      mode: uv                                                # uv | conda | none
      project: ${REPO_ROOT}/kuavo_model/external_models/openpi
    args:
      checkpoint: /home/lab/lgn/kuavo_learning_studio/checkpoints/pi05_sorting_dolls/pi05_sorting_dolls/20000                  # 必填:openpi checkpoint 目录
      policy_config_name: pi05_sorting_dolls                           # openpi 训练 config 名
      which_arm: both                                         # left | right | both(adapter 默认 right)
      model_repo_root: ""                                     # 留空 -> external_models/openpi
      execution_horizon: 0                                    # 0 -> 用 config.model.action_horizon
      device: ""                                              # "" | cuda | cuda:0 | cpu
      asset_id: ""                                            # "" -> auto-detect from checkpoint/assets/*

  # ============================================================
  # Isaac GR00T N1.7
  # ============================================================
  groot:
    adapter: isaac_gr00t_n17
    env:
      mode: uv
      project: ${REPO_ROOT}/kuavo_model/external_models/gr00tn1d7
    args:
      checkpoint: /path/to/gr00t/checkpoint                   # 必填
      embodiment_tag: NEW_EMBODIMENT                          # 或 new_embodiment
      which_arm: both
      execution_horizon: 16                                   # receding horizon chunk size
      device: cuda
      strict: false                                           # true 时开启严格 IO 检查
      model_repo_root: ""                                     # 留空 -> external_models/gr00tn1d7

  # ============================================================
  # LingBot-VLA
  # ============================================================
  lingbotvla:
    adapter: lingbot_vla
    env:
      mode: conda
      conda_env: lingbotvla
    args:
      checkpoint: /path/to/lingbot/hf_ckpt                    # 必填:hf_ckpt 目录
      training_config_path: /path/to/train_config.yaml        # 留空 -> configs/vla/real_load20000h.yaml
      qwen25_path: /path/to/Qwen2.5-VL                        # 必填:Qwen2.5-VL tokenizer/model 目录
      robot_norm_path: /path/to/robot_norm.json               # 必填:Kuavo norm stats JSON
      robot_config_path: ""                                   # 留空 -> kuavo_server/configs/lingbotvla/kuavo.yaml
      which_arm: both
      execution_horizon: 25                                   # -1 返回模型完整 chunk
      num_denoising_step: 10
      use_compile: false                                      # torch.compile
      use_fp32: false                                         # true 时用 fp32(默认 bf16)
      model_repo_root: ""                                     # 留空 -> external_models/lingbot-vla
| 参数 | 描述 | 值 |
|---|---|---|
checkpoint |
训练权重路径 | /home/lab/lgn/kuavo_learning_studio/checkpoints/pi05_sorting_dolls/pi05_sorting_dolls/20000 |
policy_config_name |
config名称,与训练时对应 | "pi05_sorting_dolls" |
配置好文件后,运行推理server端(这里不需要启动对应的环境,会自动启动对应的环境)
python kuavo_server/launch.py openpi # 选择你要启动的模型,笔者在这选择openpi
下一步运行推理client端
参照仓库文档网站Inference 说明,对configs/deploy/deploy.yaml进行修改,可以参考笔者的配置文件:
`deploy.yaml`
env:  # 推理环境设置
  inference_env: real  # 选仿真还是真机 option: sim/real
  platform_type: "5"  # 机器人型号,选项: "4pro", "5w" 或 "5"
  which_arm: both  # 控制左手、右手还是双手
  eef_type: leju_claw  # 夹爪或手型类型,仿真选择rq2f85,真机可选leju_claw(夹爪) qiangnao(灵巧手)
  ros_rate: 10  # 推理频率
  direct_to_wbc: true  # 是否开启direct to wbc模式。
  enable_action_interpolation: true # 开启direct to wbc后是否对动作进行插值,建议开启
  control_rate: 100  # WBC/插值后的实际控制指令频率


inference:  # 推理和评测设置
  go_bag_path: /home/leju/lgn/rosbag/A10-A15-L-H-01-TQ_09_01-P5_14-leju_claw-20260428170809-52-81c8a2-v003.bag # 推理时使用的rosbag路径
  policy_type: diffusion  # 要加载的模型类型,kuavo_server模式选择client, 选择client模式后下面的pretrained_path失去作用
  pretrained_path: /path/to/checkpoint # 要加载的权重路径。
  eval_episodes: 10  # 评测跑多少条
  max_episode_steps: 200  # 每条最多跑多少步

  task_prompt: "Several red pony plush toys and yellow capybara plush toys are randomly placed in the center of the table. Sorting the toys, move the red pony plush toys to the left side of the table and the yellow capybara plush toys to the right side."
更改的参数:
| 参数 | 描述 | 值 |
|---|---|---|
inference_env |
推理环境 | real |
platform_type |
机器人型号 | 5 |
direct_to_wbc |
开启direct_to_wbc模式 | true |
go_bag_path |
go_bag路径 | /home/lab/lgn/rosbag/A10-A15-L-H-01-TQ_09_01-P5_14-leju_claw-20260428170809-52-81c8a2-v003.bag |
policy_type |
选择外挂模式 | "client" |
task_prompt |
推理时用的prompt | "Several red pony plush toys and yellow capybara plush toys are randomly placed in the center of the table. Sorting the toys, move the red pony plush toys to the left side of the table and the yellow capybara plush toys to the right side." |
其中,go_bag_path设置的bag是数采中的一个bag,执行task go,会先插值到bag第一帧的位置,即可控制机器人达到工作初始位置,可此时停止任务,不执行后面的播放bag,或者专门录一个运动到工作初始位置的bag。
执行推理脚本:
python kuavo_deploy/eval_kuavo.py
运行后会出现4个选项
1. go              : 普通任务: 先插值到bag第一帧的位置, 再回放bag包前往工作位置
2. run             : 普通任务: 从当前位置直接运行模型
3. auto_test       : 仿真测试任务:仿真中自动测试模型,执行 eval_episodes 次
4. 退出
- 先选择1控制手臂插值到bag第一帧,抵达工作位置,输入s停止。(小心机器人手臂与环境碰撞)
- 选择2运行模型开始推理
选择任意选项都可以在中途输入s停止
推理日志会输出到log/kuavo_deploy/kuavo_deploy.log
实机推理效果
成功执行完整任务:
泛化测试:
| 黄色玩偶 | 红色玩偶 |
|---|---|
 |
 |
小结:测试结果表明,机器人有能力完成完整的玩偶分拣任务流程,包括目标识别、抓取、搬运与分类放置等操作。同时,在测试过程中对玩偶的摆放位置进行了随机调整,模型依然能够完成抓取与分拣任务,说明其不仅学习到了固定场景下的动作模式,还具备较强的空间泛化能力与一定的场景适应能力,在不同目标分布和位置变化情况下仍能保持良好的任务执行效果。